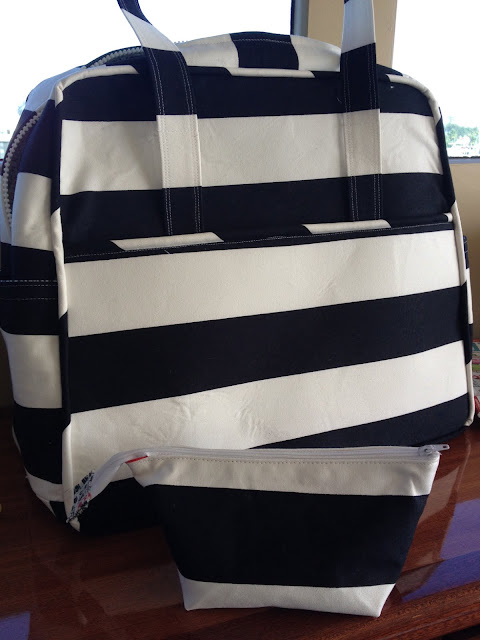
I'm not quite done with it; putting that lining in is a bit of a bitch. I got the bottom of the lining tacked down (ugly work, but its covered anyway) and am still doing the hand sewing around the zippered opening. I think it needs to be tacked at the seams where the main panels meet the side/top panels, just to keep it tidier inside. I'll blog more about it all when I'm completely done, and put in my two cents on what changes I made and what I think would make the next one go more smoothly. Here is a picture of it in its not quite done state (oooh! my first picture!)
So, I'm writing because of what is wrong with the picture. Not the picture so much (I'm sure there's much wrong with it, but I'm not striving to be a photographer) as what is in it. You can see my Weekender and the little pouch in front of it (made using this tutorial at Noodlehead) (ooh! my first link!)
First, the little pouch. It was kind of weird to make, what with pushing the zipper out of the way, and I wonked it a bit. You can see the little wee bit of the red lining peeking out a the end of the zipper. I didn't want to remove the stitching to do it over, but I'm going to because otherwise it will bother me forever. The next three that I've cut out I'm certain I will do better. Just need some more zippers (anyone know a good source?).
Second, The Weekender. There are a couple of things I see that are issues. First, fusing the Peltex to the exterior fabric has left some wrinkles. Of course, some of them could be from turning the bag inside out and back again through a couple of the steps. The pattern doesn't say to fuse the Peltex directly because we aren't asked to use fusible Peltex. I spent more on the fusible and perhaps saved the step of using the prescribed separate fusible to attach it to the main fabric. I do like the fusible Peltex, but maybe when the instructions said to hold the iron on it for 10 full seconds I skipped
Also, see near the top where the handles used to be stitched to the bag? Might be hard to see in the picture; its just below the first navy strip at the top. When I was turning it right side out, the stitching just ripped right out! Well, that won't do on a bag of this otherwise robustness. I'm going to use my secret weapon to fix them.
Ok, that's enough for now. I'll have more pictures later (today or this week) that show the lining and maybe even another thing or two.
When I'm done, should I put the picture of the finished bag on Flickr? Should I link up to something? Where does one find the etiquette on these things? Research, research, research, sew, sew, sew . . .
Holli

First off, welcome to the blogosphere! What awesome projects for your very first photo! Love your weekender! I have heard that heavier interfacings can cause some wrinkling, so it probably wasn't you. And I know an excellent source for zips!! It's an etsy shop named zipit. Seriously great product, service, and price...and I'm not the only one who thinks so around here. Second YES post your pic on flickr! Post most of your pics on flickr! You'll find real community there and I find it & my blog work together. Do you know about the weekender blog hop going on now? You should totally join in - let me know if you want more info...I also posted about it several days ago. If you aren't currently in any linky parties, ask me about that. Today's the first of the month - you should totally link up with Fresh Sewing Day's Small Blog Meet at Lily's Quilts! That'll get you going!
ReplyDeleteWelcome to blogland! Love the weekender. You'll soon find you have followers and I shall now become one. Pop over and see my blog if you like, I'd love to have you there. Best of luck with blog, sewing, and photography. Suzy x
ReplyDeleteWow, the bag looks great! A little wrinkle here and there never killed anyone. ;)
ReplyDelete